
Group: Moderator
Post: 2,039 (562 liked)
Join date: April 2014
Status: Long, long time Contax and Yashica user; glad to be here and hope to contribute.
|
|
on Jun 18, 2015 8:51:02 GMT
Posted: Jun 18, 2015 8:51:02 GMT
I'm hoping someone here can help.
I just bought a 50 1.4 from a German shop on Ebay which was described as excellent; guess what? It arrived in very quick time - always appreciated - but it has oil on the blades and a couple of small clumps of fungus in 2 of the front elements  . The seller when asked said that he'd sold many in that state and it was perfectly OK for taking photographs - technically, at this time, he's right as the aperture is still nice and snappy and the fungus doesn't impact on the image. I've decided to keep the lens as it was cheap for one of these beauties BUT I have no idea as to how to dismantle the front. Before I risk damaging it by trying the wrong approach and forcing something to breaking point, I'm wondering if someone here has attempted this successfully. . The seller when asked said that he'd sold many in that state and it was perfectly OK for taking photographs - technically, at this time, he's right as the aperture is still nice and snappy and the fungus doesn't impact on the image. I've decided to keep the lens as it was cheap for one of these beauties BUT I have no idea as to how to dismantle the front. Before I risk damaging it by trying the wrong approach and forcing something to breaking point, I'm wondering if someone here has attempted this successfully.
On this lens, the usual technique of unscrewing the front bezel does not seem to work - I'm thinking that it is like the Zeiss 50 1.4 Planar in which the entire front barrel assembly unscrews... But I'd hate to be wrong and wreck the lens. Does anyone here know the answer to disassembling the front of the lens?
Thanks in hope.... |
|

Group: Administrator
Post: 1,010 (77 liked)
Join date: January 2014
Status:
|
|
on Jun 27, 2015 3:31:04 GMT
Last Edit: Jun 27, 2015 3:31:55 GMT by ridgeblue99
|
|
Group: Moderator
Post: 2,039 (562 liked)
Join date: April 2014
Status: Long, long time Contax and Yashica user; glad to be here and hope to contribute.
|
|
on Jun 27, 2015 14:24:01 GMT
Posted: Jun 27, 2015 14:24:01 GMT
Many thanks for the link. I think I may have to surrender and send it to a professional for cleaning; even using the correct JIS screwdrivers, I'm in danger of shredding the retaining screws on the mount... |
|

Group: Member
Post: 154 (15 liked)
Join date: June 2015
Status:
|
|
on Jun 27, 2015 22:00:40 GMT
Last Edit: Jun 27, 2015 22:02:36 GMT by dragos
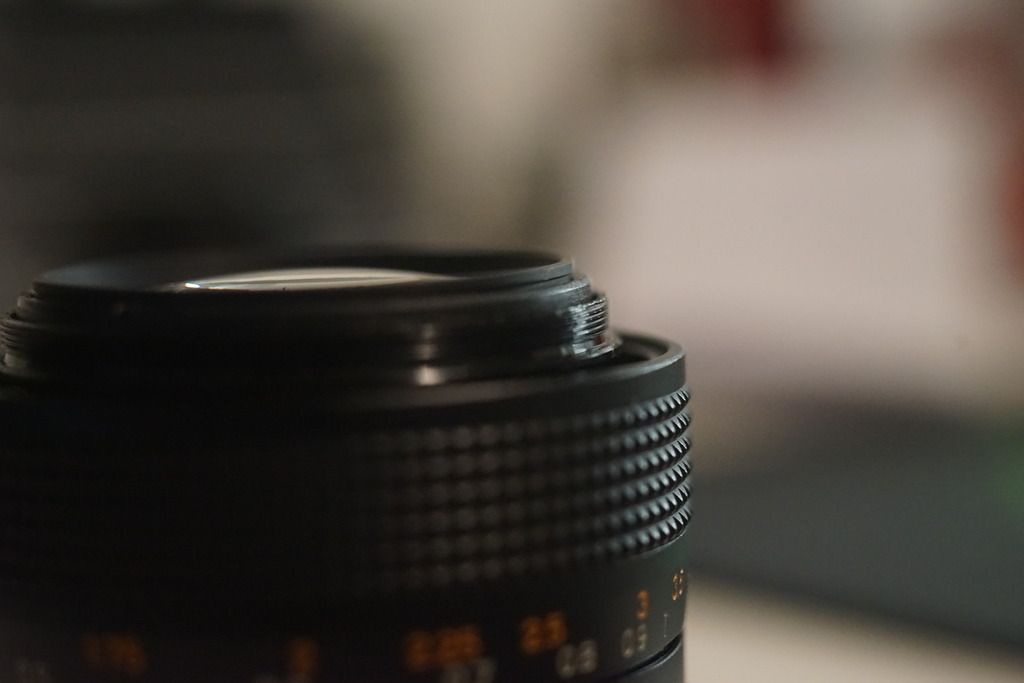
There is not any risk. I just checked on my 1.4. ( my unused, like nw condition one) Just take the lens at minimum focus,and turn the lens barrel. Is like the 24mm if you opened one. From this point is easy, unscrew the front optic block and you are at blades. 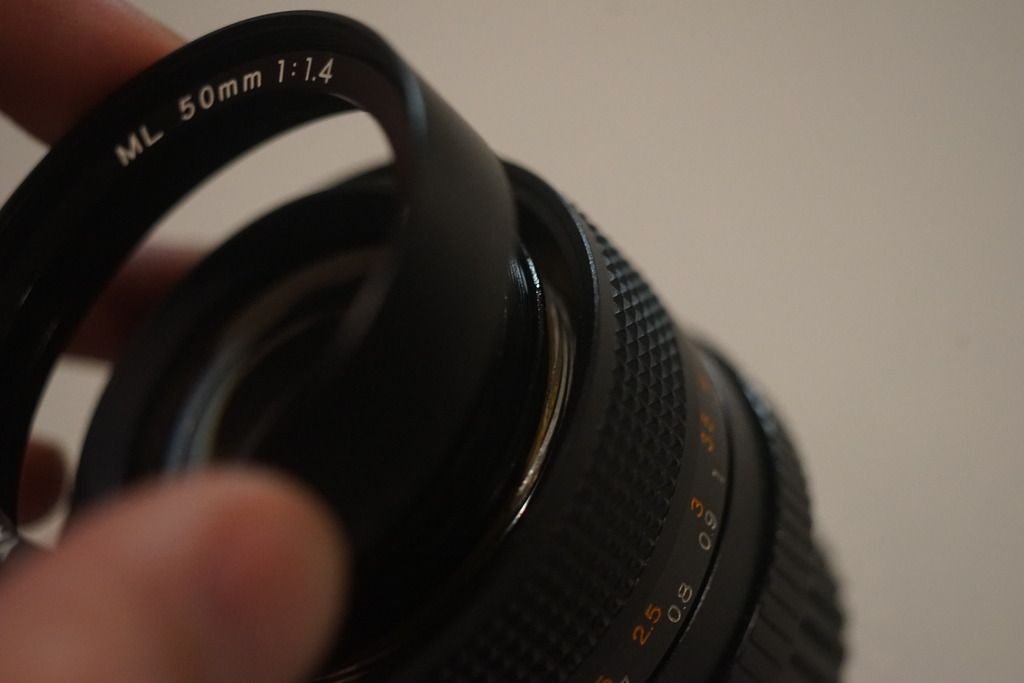 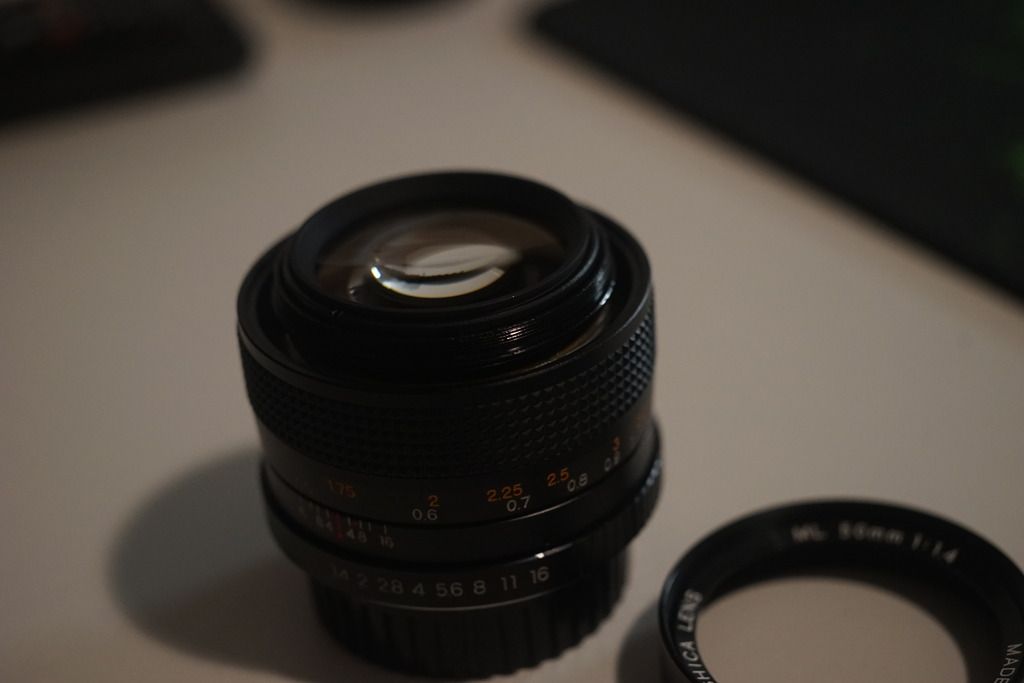
 |
|
Group: Member
Post: 154 (15 liked)
Join date: June 2015
Status:
|
|
on Jun 27, 2015 22:03:49 GMT
Posted: Jun 27, 2015 22:03:49 GMT
P.S. images taken with ml 55 f4  |
|
Group: Moderator
Post: 2,039 (562 liked)
Join date: April 2014
Status: Long, long time Contax and Yashica user; glad to be here and hope to contribute.
|
|
on Jun 28, 2015 0:31:32 GMT
Last Edit: Jun 28, 2015 0:31:39 GMT by biggles3
Hi Dragos, many thanks for confirming the method. Oddly, I had just opened up a ML 50 f2 that way quite by accident as I was using a filter remover but the filter wouldn't move, so the front end came away instead. That is also how you open the 50mm 1.4 Zeiss Planar. Unfortunately, even with my lens tools, I've been unable to shift the front assembly as yet. I'll just keep trying - it has to move one day!
|
|
Group: Member
Post: 6 (0 liked)
Join date: April 2016
Status:
|
|
on Apr 17, 2016 12:34:58 GMT
Last Edit: Apr 17, 2016 12:58:52 GMT by laufer
First hello to all ! Please, any help is welcome: I want to clean up fungus on front element on my Yashica ML 50mm f/2.0. First i set min focus(0.5m), i tryed unscrew(on the left) front barrel with hand, but no way. Then i put lens into NEX adapter, i put around barrel 1cm rubber, then i tryed unscrew with hands but without lucky  , barrel wont budge.. Any idea ?   |
|
Group: Moderator
Post: 2,039 (562 liked)
Join date: April 2014
Status: Long, long time Contax and Yashica user; glad to be here and hope to contribute.
|
|
on Apr 17, 2016 20:05:41 GMT
Posted: Apr 17, 2016 20:05:41 GMT
Hello laufer,
Welcome to the Forum!
I suspect that the only way to access the front element is to disassemble the lens from the rear - unless someone else here knows differently. Different lenses may require different disassembly techniques which is confusing to an amateur repairer like many of us.
I have a 50 f2 with mild fungus behind the front element that came with a camera I bought on Ebay and thought 'this'll be easy..'; wrong! When I realised that the barrel would not budge, I removed the front bezel and was surprised to see that there is no access to the front element assembly from there. I then looked at the mount and spotted that a previous owner had tried to undo the 4 retaining screws and had stripped the heads of two of them so I could not free it; I've put the lens to one side until I have set up a drill in a vertical stand so that I can drill out those damaged screws.
If you decide to try removing the screws on the mount, remember to use JIS screwdrivers and not Phillips as you are much more likely to strip them with a Phillips. For some reason, I have always found Yashica mount screws more difficult to shift than those on Zeiss lenses...
Good luck! |
|
Group: Member
Post: 6 (0 liked)
Join date: April 2016
Status:
|
|
on Apr 17, 2016 21:03:54 GMT
Last Edit: Apr 17, 2016 21:06:31 GMT by laufer
Thanks biggles3 for quick respond. If I understand correctly, i must first unscrew back screws, then disassemble all parts on back, in fact, on this Yashica lens front panel is last (he was the last to whom i come) ? Similarly for DSB 50mm f1.9 www.flickr.com/photos/7699588@N07/sets/72157632482008350/ ? |
|
Group: Moderator
Post: 2,039 (562 liked)
Join date: April 2014
Status: Long, long time Contax and Yashica user; glad to be here and hope to contribute.
|
|
on Apr 17, 2016 23:12:02 GMT
Posted: Apr 17, 2016 23:12:02 GMT
Thanks biggles3 for quick respond. If I understand correctly, i must first unscrew back screws, then disassemble all parts on back, in fact, on this Yashica lens front panel is last (he was the last to whom i come) ? Similarly for DSB 50mm f1.9 www.flickr.com/photos/7699588@N07/sets/72157632482008350/ ? I don't know if anyone else on this Forum knows the correct way to dismantle the 50 f2 but I'm pretty sure that if you follow the first section of the DSB disassembly you should be able to remove the rear elements and the aperture assembly. What I don't think will be the same is where on the DSB, he uses the wrench to twist off the front barrel of the lens - it may be that with the 50 f2, there are some screws holding the front assembly in place which will need to be undone. I'm going to see if I have a spare 50 f2 and I'll try to take it apart... I'll keep you informed. |
|
Group: Administrator
Post: 1,010 (77 liked)
Join date: January 2014
Status:
|
|
on Apr 18, 2016 1:46:49 GMT
Last Edit: Apr 18, 2016 1:49:00 GMT by ridgeblue99
First hello to all ! Please, any help is welcome: I want to clean up fungus on front element on my Yashica ML 50mm f/2.0. First i set min focus(0.5m), i tryed unscrew(on the left) front barrel with hand, but no way. Then i put lens into NEX adapter, i put around barrel 1cm rubber, then i tryed unscrew with hands but without lucky , barrel wont budge.. Any idea ? Laufer, Welcome to the forum. Sorry to see you are having problems with the disassembly of your ML 1.4/50. Like Biggles says, it may be of a different construction than the DSB 1.9/50. Never having owned one, or needed to take one apart, I can't tell you. If there is fungus directly behind the front element, then you are basically out of luck as far as removing it. This is because the front element is part of a cemented group, and you would have to separate the elements to clean off the fungus. It's not a task us amateur repair folks were meant to take on. It was a little easier to do back when Canadian Balsam was used as the cement, but now it's some sort of UV actuated glue that would take more than the usual hot water heating to get it to loosen its grip. Then after getting everything looking good (that is, if the fungus didn't etch the lens), you have to be able to put it back together in precise alignment, or suffer from really weird looking images forever. This takes proper tooling which the manufacturers won't make available to anyone except the most professional repair establishments. If the lens is etched, then you are looking at having to regrind it, something else left to the professionals. There are not many places left that do this kind of work, and they are expensive to say the least. If ground, then the element would also need to be re-coated. Now if the fungus happens to be on the rear of the front element group, then it can possibly be cleaned. Sometimes you can do this by removing the rear group, and opening up the aperture to access the rear of the front group. You then run the risk of not being able to get the rear element cleaned correctly, which will leave a haze behind, and affect the lens sharpness. Some methods of removing the fungus involve Ponds Cold Cream, a 50/50 solution of hydrogen peroxide and ammonia, athletes foot cream, or the oil from your nose (which happens to be highly anti-biotic). My take on the whole matter is, get another lens from a dry climate. I have a feeling that the Yashica ML lenses are susceptible to fungus invasion more than any other modern lens around. But here are some other thoughts on the matter. To cure a fungus invasion of a camera lens, nothing works better than good old sunlight, or a strong UV lamp. Fungus thrives in the dark, so take your lenses out to shoot often enough to kill any spores that may be trying to settle in. And keep the UV filters off unless they are necessary (like shooting in the mountains around here for instance). You can also kill an established invasion by putting the lens in sunlight (don't let the exit beam burn a hole in whatever is behind the lens), or the aforementioned UV lamp, for a period of a couple of days to a week. Though this may leave behind the remains of the fungus, it will lessen its affect on image quality. And speaking of such, if the invasion is not very big, it might not show in your photos. I've used lenses with all kinds of crap in them without it causing a problem. It just depends on how much fungus there is, and how much other stuff like dust is accompanying it. Don't store lenses in the leather cases, it's a perfect breeding ground for fungus. Keep your lenses in a dry place. Good luck. |
|
Group: Member
Post: 6 (0 liked)
Join date: April 2016
Status:
|
|
on Apr 18, 2016 10:15:50 GMT
Posted: Apr 18, 2016 10:15:50 GMT
Thanks to the detailed instructions, i am really delighted with you guys, you are the true kings!  Do you think that exposure of the lens to heat(sunlight) will not cause oil on aperture, due to warming ? |
|
Group: Administrator
Post: 1,010 (77 liked)
Join date: January 2014
Status:
|
|
on Apr 21, 2016 1:33:14 GMT
Posted: Apr 21, 2016 1:33:14 GMT
Thanks to the detailed instructions, i am really delighted with you guys, you are the true kings! Do you think that exposure of the lens to heat(sunlight) will not cause oil on aperture, due to warming ? That could happen. Probably best to get a "black light" bulb, and make a box to mount it all in (with ventilation to keep the heat from the bulb building up). PF |
|
Group: Member
Post: 75 (3 liked)
Join date: April 2016
Status:
|
|
on May 23, 2016 22:39:12 GMT
Posted: May 23, 2016 22:39:12 GMT
I recently disassembled ML 50 f2. The aperture as well as front lens group can be accessed from front. If anyone needs it, I can post some instructions, no problem.
The 1.4 is more likely similiar in buit to 1.7 which I plan to disassemble sometime in the fiture.
|
|
Group: Member
Post: 7 (0 liked)
Join date: May 2016
Status:
|
|
on May 25, 2016 6:02:30 GMT
Posted: May 25, 2016 6:02:30 GMT
I recently disassembled ML 50 f2. The aperture as well as front lens group can be accessed from front. If anyone needs it, I can post some instructions, no problem. The 1.4 is more likely similiar in buit to 1.7 which I plan to disassemble sometime in the fiture. Those instructions would be nice. Please post them |
|


 . The seller when asked said that he'd sold many in that state and it was perfectly OK for taking photographs - technically, at this time, he's right as the aperture is still nice and snappy and the fungus doesn't impact on the image. I've decided to keep the lens as it was cheap for one of these beauties BUT I have no idea as to how to dismantle the front. Before I risk damaging it by trying the wrong approach and forcing something to breaking point, I'm wondering if someone here has attempted this successfully.


 , barrel wont budge..